
1/8/2017 Webmaster
A C# Mission Launcher For Project Malmo Minecraft
This article covers the AI Help Website Malmo C# Mission Launcher for Project Malmo. This should provide a good starting point for your AI experiments.
Project Malmo
Project Malmo is a AI experimentation platform designed to work with Minecraft. Its purpose is to support research in artificial intelligence. It allows allows researchers to write code for artificial intelligence agents that can act within the Minecraft environment.
There are a lot of code examples for the Python programming language, but very little for C#. The Malmo C# Mission Launcher is designed to assist C# developers and researchers.
The AI Help Website C# Mission Launcher
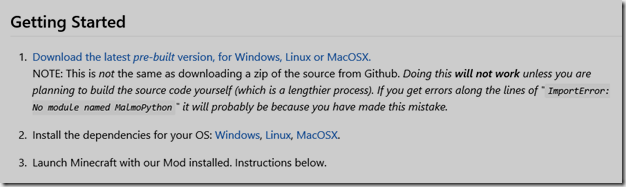
The first step to using Malmo, is to install it and Minecraft, using the directions here:
https://github.com/Microsoft/malmo#getting-started
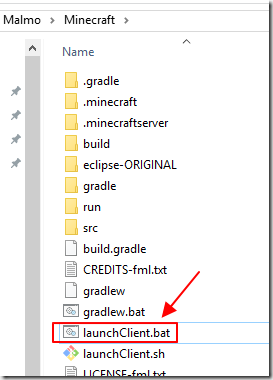
Launch the Malmo client, this will also start Minecraft.
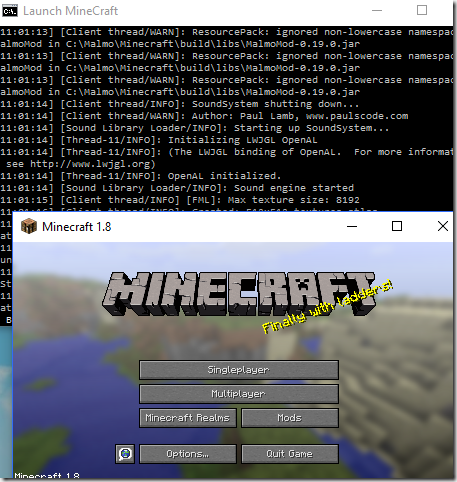
Wait for the Malmo client and Minecraft to build and be fully running…

Download and unzip the AI Help Website Malmo C# Mission Launcher (MalmoCSharpLauncher) from the download page on this site.
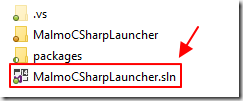
Open it up in Visual Studio 2015 (or higher).
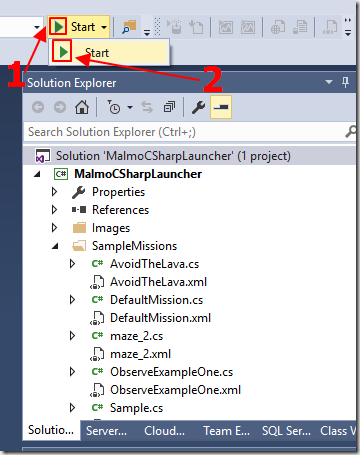
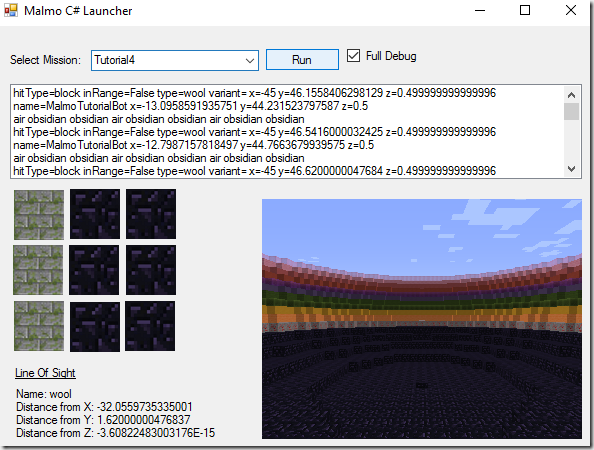
Run the MalmoCSharpLauncher.
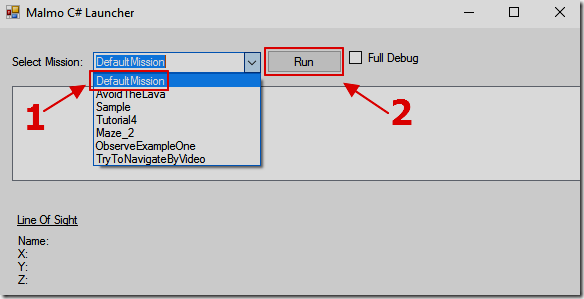
Select the Default mission and click Run.
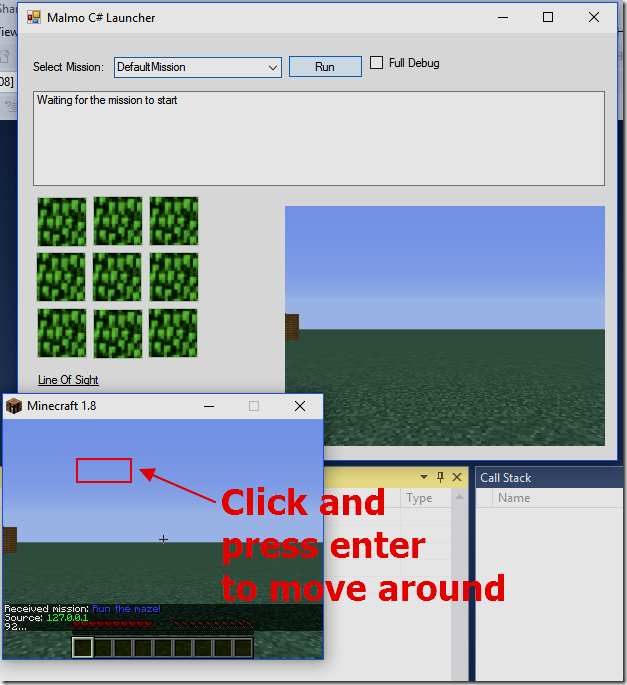
Minecraft will load the mission, and you can click inside the Minecraft window, press enter, and navigate inside Minecraft.
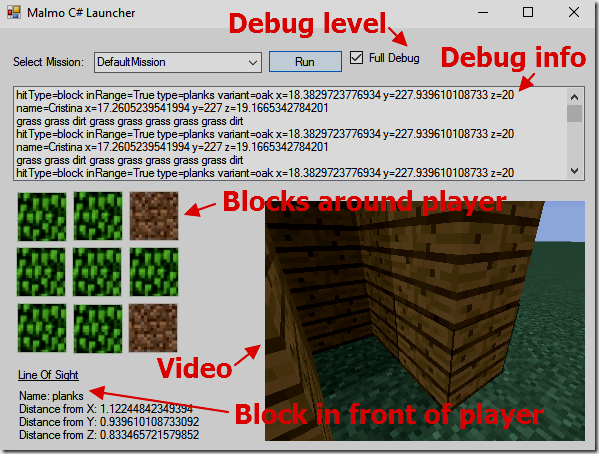
The Malmo C# Launcher will display diagnostic data.
(note, the Default mission is set to only run 90 seconds before diagnostic information stops)

If you stop the Malmo C# Launcher and look in the bin/x64/Debug/mission_records directory, you will see the saved data for the missions.
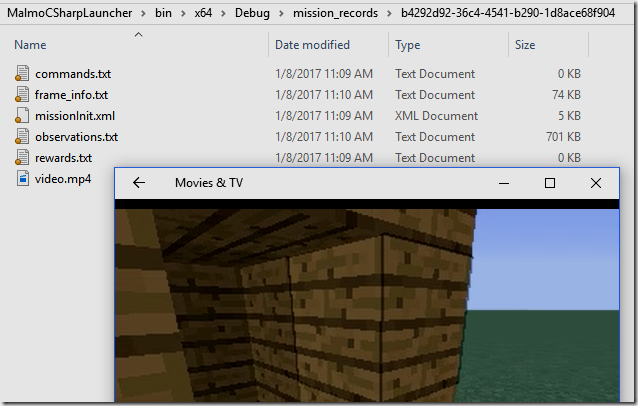
Opening one of these directories up will give you access to all the logs for the mission including a video of it.
Malmo Missions
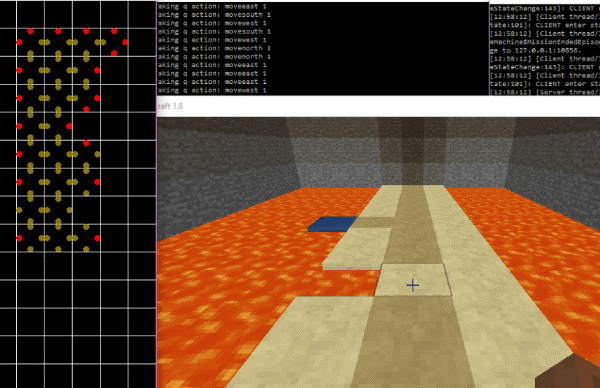
If you run the Malmo Python example from their tutorial you will see how to create missions that teach the Agent (the player).
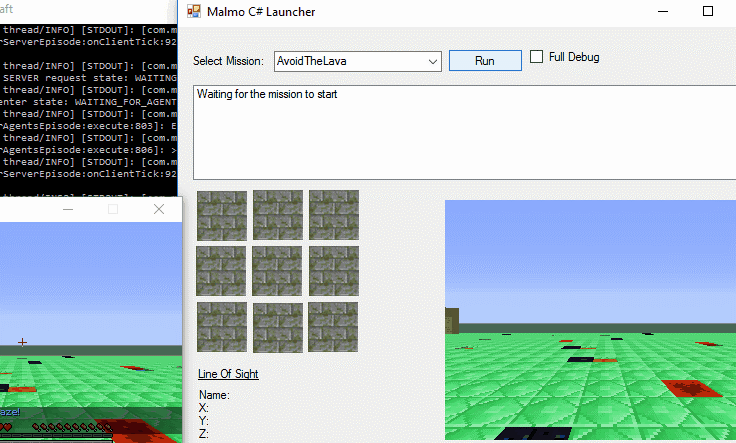
The Malmo C# Launcher contains a mission called “AvoidTheLava” that provides a simplified version of a mission.
This has the Agent walk in a strait line, until he detects lava. If he does, he turns to avoid it and continues walking.
The mission is complete when the Agent reaches a grass block.
Creating A Mission
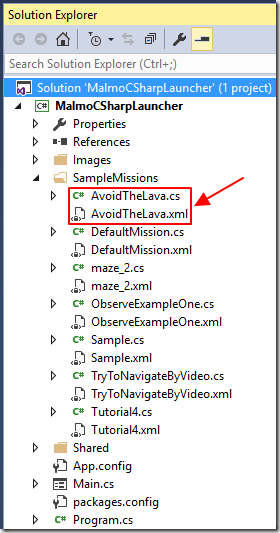
A mission consists of a C# class and a .xml file.
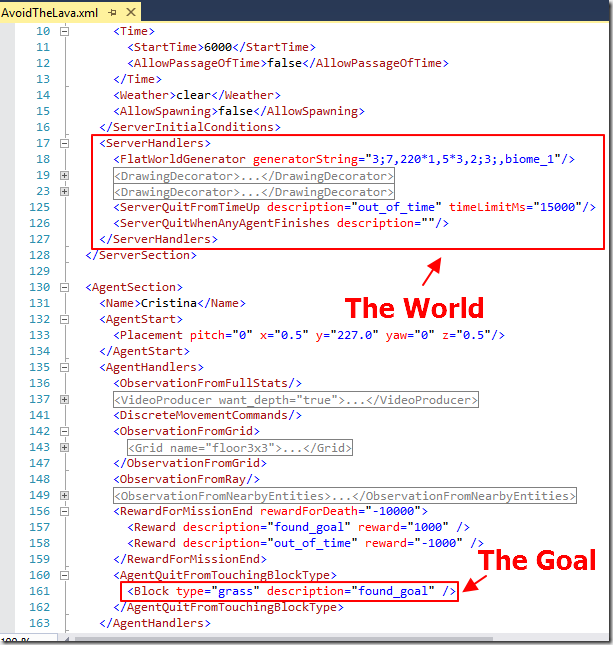
The contents of the .xml file describe the world and the goal.
The documentation for the .xml file and all the API methods used in the code below are available at this link.
The code to control the mission is simple, and basically runs in a continuous loop until the mission is complete (or manually stopped).
The mission code makes an observation about what is going on, and then reacts to it by directing the Agent using the agentHost.sendCommand function.
The Malmo C# Launcher contains a number of helper classes to assist in gathering observations, so that the actual custom code required for the mission is relatively small, and is as follows:
   WorldState worldState;
    JavaScriptSerializer json_serializer = new JavaScriptSerializer();
    agentHost.setObservationsPolicy(ObservationsPolicy.LATEST_OBSERVATION_ONLY);
    agentHost.setVideoPolicy(VideoPolicy.LATEST_FRAME_ONLY);
    string strMoveCommand = "";
    // main loop:
    do
    {
        // Get Worldstate
        worldState = agentHost.getWorldState();
        Thread.Sleep(500);
        // Make an Observation
        Observation objObservation = RunMission.LogMission(
            worldState, lstMessage, pnl3x3, pnlDiagData, chkFullDebug);
        // Only proceed if we are able to get back an Observation
        if (objObservation.floor3x3 != null)
        {
            // Check for "lava" anywhere around us
            if (!
                (
                (objObservation.floor3x3[1].ToString() == "lava") ||
                (objObservation.floor3x3[4].ToString() == "lava") ||
                (objObservation.floor3x3[7].ToString() == "lava")
                ))
            {
                // There is no Lava -- keep moving forward
                strMoveCommand = String.Format("{0} {1}", "move", 1);
                agentHost.sendCommand(strMoveCommand);
                lstMessage.Items.Insert(0, strMoveCommand);
            }
            else
            {
                // There is lava nearby
                for (int i = 0; i < 8; i++)
                {
                    if (objObservation.floor3x3[i].ToString() == "lava")
                    {
                        lstMessage.Items.Insert(0, String.Format("Lava found at block: {0}", i));
                    }
                }
                // Turn and move
                strMoveCommand = String.Format("{0} {1}", "turn", 1);
                agentHost.sendCommand(strMoveCommand);
                lstMessage.Items.Insert(0, strMoveCommand);
                strMoveCommand = String.Format("{0} {1}", "move", 1);
                agentHost.sendCommand(strMoveCommand);
                lstMessage.Items.Insert(0, strMoveCommand);
            }
        }
        if (worldState.is_mission_running && worldState.video_frames.Count > 0)
        {
            // Converts the Malmo ByteVector to a Bitmap and display in pictureBoxMineCraft
            pictureBoxMineCraft.Image =
                ImageConvert.GetImageFromByteArray(worldState.video_frames[0].pixels);
            pictureBoxMineCraft.Invalidate();
            pictureBoxMineCraft.Refresh();
        }
    }
    while (worldState.is_mission_running);
    lstMessage.Items.Insert(0, "Mission has stopped.");
Notes
- You can get a list of all possible moves and Minecraft objects recognized and manipulateable from the files in the schemas directory.
- When installing Malmo, do not install it in a directory that has any spaces. Use a directory like “C:\malmo”
- To run the Python examples, install the exact versions that the Malmo directions suggest.
Links
Project Malmo
https://www.microsoft.com/en-us/research/project/project-malmo/
Project Malmo Blog
http://microsoft.github.io/malmo/blog
Project Malmo Github
https://github.com/Microsoft/malmo
Project Malmo Issues (forum)
https://github.com/Microsoft/malmo/issues
Project Malmo Documentation
http://microsoft.github.io/malmo/
Project Malmo Download
https://github.com/Microsoft/malmo/releases
Download
You can download the code for the Project Malmo C# Mission Launcher from the Download page